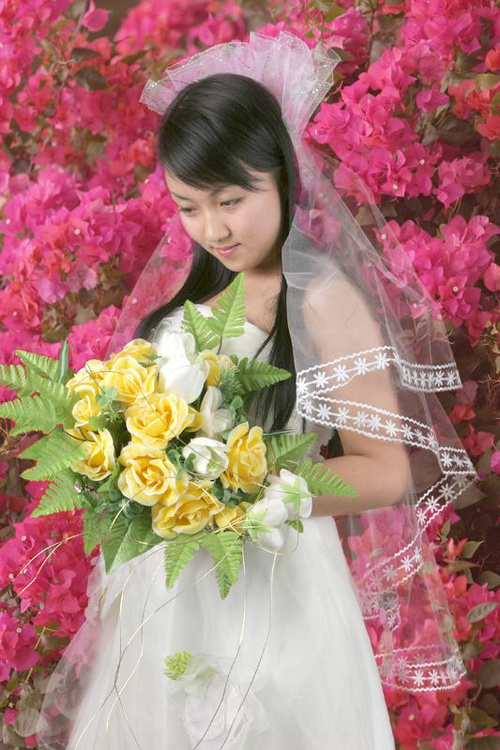
http://www.68ps.com/jc/big_ps_tp.asp?id=26486一般情况下这种透明婚纱直接用通道可以抠出,不过背景复杂一些的婚纱,最好是把相应的通道复制到图层中,运用滤镜,涂抹工具,画笔等可以更加细致的抠出。
原图

<点图片查看大图>
最终效果

<点图片查看大图>

<点图片查看大图>
1、把原图素材大图保持到本机,打开PS,再打开保持的原图素材,进入通道面板,把蓝色通道复制一层,得到蓝副本通道,如下图。

2、选择蓝副本通道,按Ctrl + L 调整色阶,把暗部及中间调都压暗一点,参数及效果如下图。


3、按Ctrl + A 把蓝副本通道全选,按Ctrl + C 复制,点RGB通道返回图层面板,新建一个图层,按Ctrl + V 粘贴,效果如下图。后面的操作比较复杂新手最好到240ps.com视频栏目查看视频教程。

4、把当前图层再复制两层,选择底部的图层,上面的两个图层暂时隐藏,如下图。

5、选择菜单:滤镜 > 模糊 > 表面模糊,参数及效果如下图。


6、把当前图层上面的图层显示出来,如下图。

7、按住Alt键 + 鼠标左键点击蒙版图标,填充黑色蒙版,如下图。

8、把前景色设置为白色,选择画笔工具,在画笔预设里面找一款柔边圆形画笔,画笔不透明度设置为50%,如下图。

9、调整好画笔大小,把裙子褶皱较亮区域部分擦出来,如下图。

10、创建色阶调整图层,把暗部及中间调区域压暗,参数设置如下图。

11、把背景图层复制一层,按Ctrl + Shift + ] 置顶,用钢笔工具把人物部分抠出来,转为选区后添加图层蒙版,如下图。

12、调出人物部分的选区,把当前图层隐藏,在色阶调整图层上面新建一个图层,按Ctrl + Shift + I 把选区反选,然后用油漆桶工具填充黑色,然后取消选区,效果如下图。

13、新建一个图层,按Ctrl + Alt + Shift + E 盖印图层,然后选择涂抹工具,强度设置为20%,如下图。

14、把裙子半透明的白色区域涂抹自然一点,如下图。

15、新建一个图层,把前景色设置为黑色,选择一款柔边画笔,画笔不透明度10%,如下图。

16、新建一个图层,用画笔把高光区域不自然的区域涂暗一点,如下图。

17、这是现在的效果。

18、新建一个图层,盖印图层,用涂抹工具再细化一下,效果如下图。

19、进入通道面板,按住Ctrl + 鼠标左键点击RGB通道缩略图载入选区,如下图。

20、回到图层面板,新建一个图层把选区填充白色,取消选区后效果如下图。

21、在当前图层下面新建一个图层,用油漆桶工具填充黄绿色,如下图。

22、把顶部抠出的人物图层显示出来,在蒙版上用柔边黑色画笔把飘纱部分擦出来,如下图。

23、打开背景素材大图,用移动工具拖进来,放到纯色图层上面,效果如下图。

<点图片查看大图>

最终效果:

原图

<点图片查看大图>
最终效果

<点图片查看大图>

<点图片查看大图>
1、把原图素材大图保持到本机,打开PS,再打开保持的原图素材,进入通道面板,把蓝色通道复制一层,得到蓝副本通道,如下图。

2、选择蓝副本通道,按Ctrl + L 调整色阶,把暗部及中间调都压暗一点,参数及效果如下图。


3、按Ctrl + A 把蓝副本通道全选,按Ctrl + C 复制,点RGB通道返回图层面板,新建一个图层,按Ctrl + V 粘贴,效果如下图。后面的操作比较复杂新手最好到240ps.com视频栏目查看视频教程。

4、把当前图层再复制两层,选择底部的图层,上面的两个图层暂时隐藏,如下图。

5、选择菜单:滤镜 > 模糊 > 表面模糊,参数及效果如下图。


6、把当前图层上面的图层显示出来,如下图。

7、按住Alt键 + 鼠标左键点击蒙版图标,填充黑色蒙版,如下图。

8、把前景色设置为白色,选择画笔工具,在画笔预设里面找一款柔边圆形画笔,画笔不透明度设置为50%,如下图。

9、调整好画笔大小,把裙子褶皱较亮区域部分擦出来,如下图。

10、创建色阶调整图层,把暗部及中间调区域压暗,参数设置如下图。

11、把背景图层复制一层,按Ctrl + Shift + ] 置顶,用钢笔工具把人物部分抠出来,转为选区后添加图层蒙版,如下图。

12、调出人物部分的选区,把当前图层隐藏,在色阶调整图层上面新建一个图层,按Ctrl + Shift + I 把选区反选,然后用油漆桶工具填充黑色,然后取消选区,效果如下图。

13、新建一个图层,按Ctrl + Alt + Shift + E 盖印图层,然后选择涂抹工具,强度设置为20%,如下图。

14、把裙子半透明的白色区域涂抹自然一点,如下图。

15、新建一个图层,把前景色设置为黑色,选择一款柔边画笔,画笔不透明度10%,如下图。

16、新建一个图层,用画笔把高光区域不自然的区域涂暗一点,如下图。

17、这是现在的效果。

18、新建一个图层,盖印图层,用涂抹工具再细化一下,效果如下图。

19、进入通道面板,按住Ctrl + 鼠标左键点击RGB通道缩略图载入选区,如下图。

20、回到图层面板,新建一个图层把选区填充白色,取消选区后效果如下图。

21、在当前图层下面新建一个图层,用油漆桶工具填充黄绿色,如下图。

22、把顶部抠出的人物图层显示出来,在蒙版上用柔边黑色画笔把飘纱部分擦出来,如下图。

23、打开背景素材大图,用移动工具拖进来,放到纯色图层上面,效果如下图。

<点图片查看大图>

最终效果:

版权声明
本文仅代表作者观点,不代表本站立场。
本文系作者授权发表,未经许可,不得转载。
本文地址:/PMsheji/zhaopianchuli/152747.html


