MAYA车轮建模教程:MAYA制作真实的车轮建模
早上看到潘少俊衡MAYA群里的一位朋友的车轮模型截图,觉得做的还是挺不错的,很多新手朋友也想学习MAYA汽车建模的具体流程和方法,给大家翻译一个国外的MAYA车轮建模的教程,希望对大家有所帮助吧!如果有看不懂教程的朋友请大家在评论中说明,我会及时回复。好了,先来看看最终的效果图:

本文着重介绍的是轮胎的轮毂建模,轮胎建模教程潘少俊衡已经不少了,这里就不做介绍了,好了,一起来学习吧!
Step 1
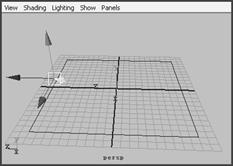
首先创建一个Polygon Cylinder.

删除两个底面,如图所示:

选择顶部的线条,使用挤压命令,挤压出如图所示形状:Select all top edges end extrude with tool witch you can find in Edit mash - Extrude.

向上挤压Then extrude up.

再次挤压到如图所示形状。Then with Extrude tool make object like on picture.

再次使用挤压工具,制作出下图形状。Then with Extrude tool make object like on picture.

当你的模型状态如下所示时改变到选择点模式。When your model starts to look like on this picture change to vertex mode.

这时执行,合并中心点到面。Then select centar vertex and go to Edit mash - Merge to Center.

得到如图所示模型。It has to look like on picture.

复选如图所示的面,按住SHIFT键即可复选。Than select faces like on picture.

挤压选择的面Extrude selected faces.

切换到边选择模式,如图:Switch to edge mode and select edges like on picture.

Then select the Y axis ,hold "v" on keyboard and with mouse scroll wheel click on the marked vertex to align.

Align rest edges with marked vertex to look like on picture.

Step 15
Select faces.

Extrude selected faces.

With "Insert Edge Loop Tool" add edges to look like on picture.

Then remove the marked edges.

Delete rest of the edges with "delete edge/vertex" tool and leave the edge marked od picture.

Select faces.

Extrude faces.

Step 22
Again extrude same faces.

Scale faces.

Delete faces.

Add edges with "Insert Edge Loop Tool" to look like on picure.

Again add edges with "Insert Edge Loop Tool" on each hole.
Step 27
Select 20 edges.

When you selected edges go to "Insert Edge Loop Tool" settings and turn off "auto complete" and clik on one of selected edges, and when you done press enter on keyboard .

Step 29
Extrude faces to look like on picture.

Step 30
Extrude again.

And again.

And again.

Then selected edges pull down.

With "Insert Edge Loop Tool" add edges like on picture.

Step 35
Add edges on each hole to look like this.

Use "Insert Edge Loop Tool" to add edges.

Repeat procedure from previous step .

"Insert Edge Loop Tool" again.

And again.

Then create the new cilinder and place it like on picture.

Step 41
Add edges to new cilynder.

Create new cilinder with 6 edges.

On top edges apply Bevel tool with settings approximately like on picture.
Step 44Should look like the picture.

Select all external edges and apply the bevel toll as shown.

Should look like the picture.

Step 47
Then create new cilinder to look like this on picture.

Add edges with "Insert Edge Loop Tool".

Select center vertex and pull up.

Last three cilinders set like on picture.

Step 51
Select last three cilinders and make group with (ctrl+g) on keyboard.

Go to edit and press dublicate special settings .

Numbers of copies 4 , rotate y axis 72.

Cover all cylinders as shown and press the number 3 on the keyboard.

Should look like on picture.

Go to Modify -> Convert -> Smooth Mash Preview to Polygons.


加上轮胎渲染之后的效果图如下:
教程结束,希望这篇MAYA车轮建模教程对大家有所帮助!
版权声明
本文仅代表作者观点,不代表本站立场。
本文系作者授权发表,未经许可,不得转载。
本文地址:/3Dsheji/169083.html